How to Develop an Application connected with BLE 5 Devices on Dusun’s Gateways

As the Dusun Gateway is running based on the Linux system, how to implement an application over the Bluez stack to ‘talk’ with BLE 5 devices on Dusun BLE gateways 1 will be presented here.
The Linux OpenWrt system is used by Dusun’s gateways. Figure 1 shows how Linux can run the Bluez stack and support the Bluetooth Low Energy protocol. The fundamental Bluetooth protocols and levels are supported by BlueZ. It employs a modular design and is versatile and effective. All essential Bluetooth layers and protocols are now supported by the BlueZ stack. Users can write BLE applications using Bluez APIs to manipulate BLE 5 devices.
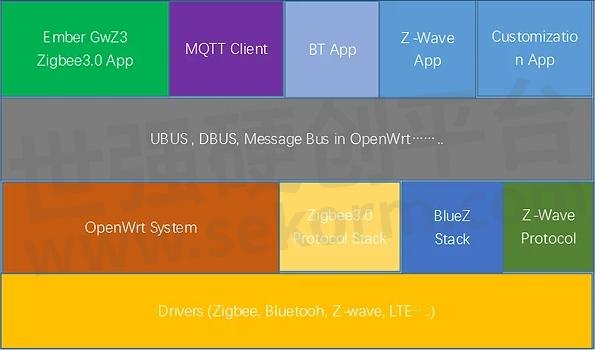
Figure 1. Dusun Gateway system architecture
System Configuration
The Dusun gateways are configured through a web service which means the gateways should be connected with a computer first. The Dusun gateway can be connected through wired connection and a WIFI connection.
Wired connection
The two RJ45 ports gateway includes a WLAN port and LAN ports. The
wired connection of this type of gateway is shown below figure 2-A. Users
can use the gateway default LAN IP address: 192.168.66.1 to connect it.
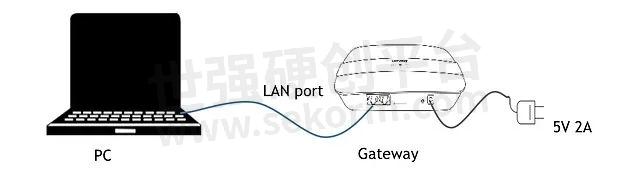
Figure 2-A Direct connection
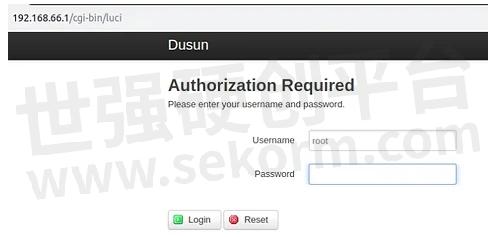
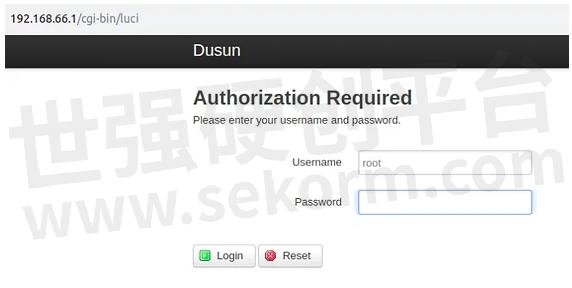
After the above physical connection is completed, please open a web browser on PC, Input Gateway IP Address;Enter the username and Password(default Username: root Password: root),login to the gateway.
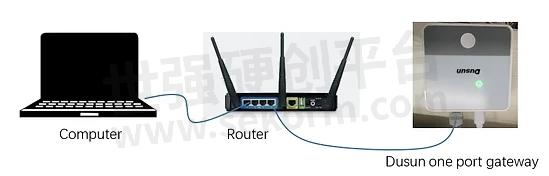
Figure 2-B Connection via a router
After the above physical connection is completed, please open a web browser on your PC, Input the Gateway IP Address, Enter the username and Password(default Username: root Password: root), login into the gateway.
WIFI connection
The Dusun gateway supports a WIFI connection to login it, but WIFI is not
enabled by default. The WIFI should be enabled first if the user wants to use
WIFI to connect a gateway. Users should log in to the gateway through the
above-wired connection to enable the WIFI module. After the connection
is established, please follow the below steps to enable WIFI:
1. Login to the gateway (see above figure);
2. Select Dusun > Wifi Manage.
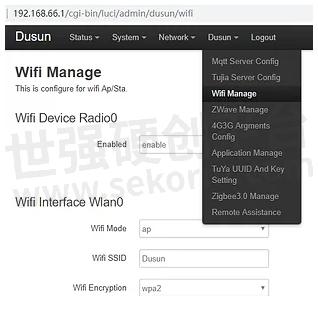
3. Enable Device Radio0 and configure Wifi Interface Wlan0(Wifi Mode:ap, Wifi SSID: Input your own; WIFI Encryption: PSK2 or others; WIFI key: your password)
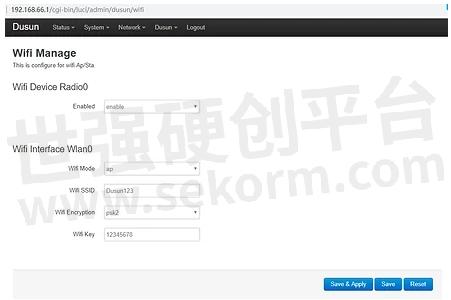
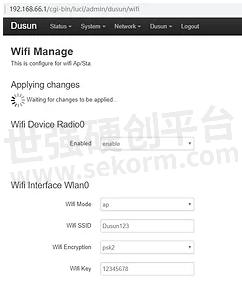
4. Click the Save & Apply button, and wait for the changes to be applied.
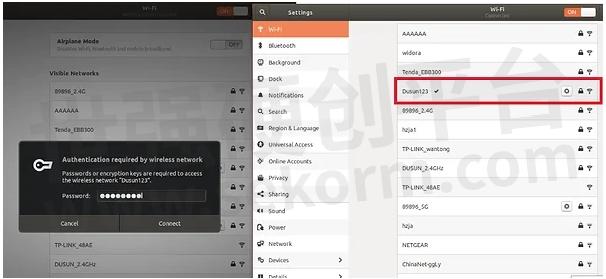
5. Then we can connect the WIFI (for this case: Dusun123) and connect the gateway through WIFI.
Gateway Configuration
After the connection between the gateway and the computer is established, the gateway can be configured following these steps:
1. Open a web browser on your PC, input the gateway IP address, enter the username and Password (default username: root password: root), login to the gateway;
2. Make system configuration at the system menu, the timezone, password, and others can be revised here.
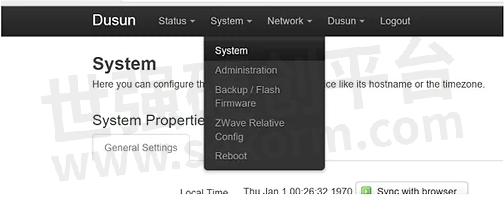
3. Configure the network at the network sub-menu.

4. Configure other settings according to users’ needs.
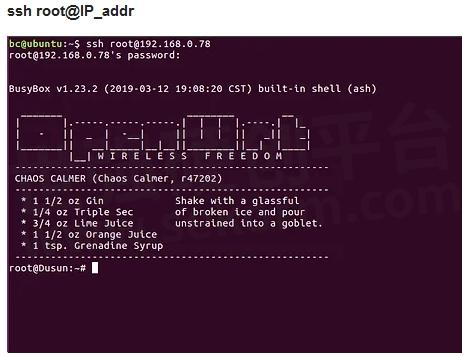
When the configuration is completed please reboot the gateway. Then users can log in to the gateway by inputting the following ssh commands in a terminal, and then input their password. IP_addr is the IP address that which user configured above. The default IP is 192.168.66.1. The below figure shows the login scene.
API for BLE5 software development
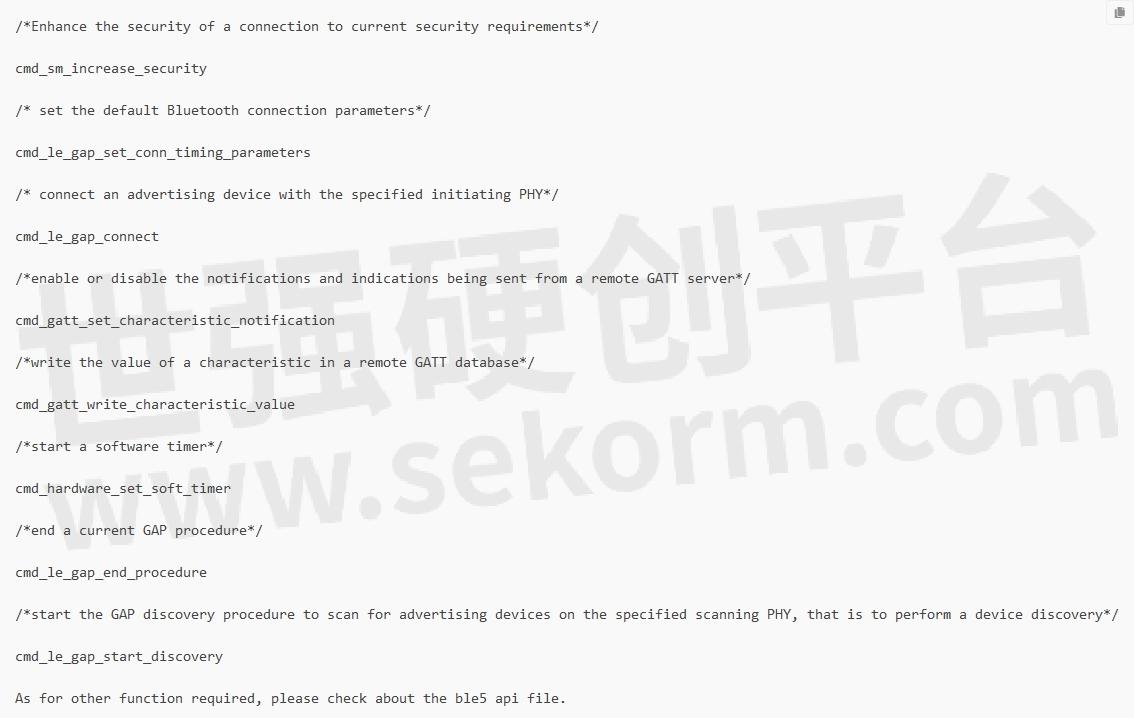
Dusun BLE gateway implemented the EFR32BG21 BLE5 chip from the silicon lab. In order to simplify the programming procedures, we provide a detailed API document seen from the attached file for all kinds of implementation, some core function is listed below,
A sample program: read data from an oximeter BLE sensor
We have provided a sample application to get the BLE oximeter sensor data. To be more specific, the function of scan, connect, and read data is called in app.c file. The main function in the main. c is shown below.
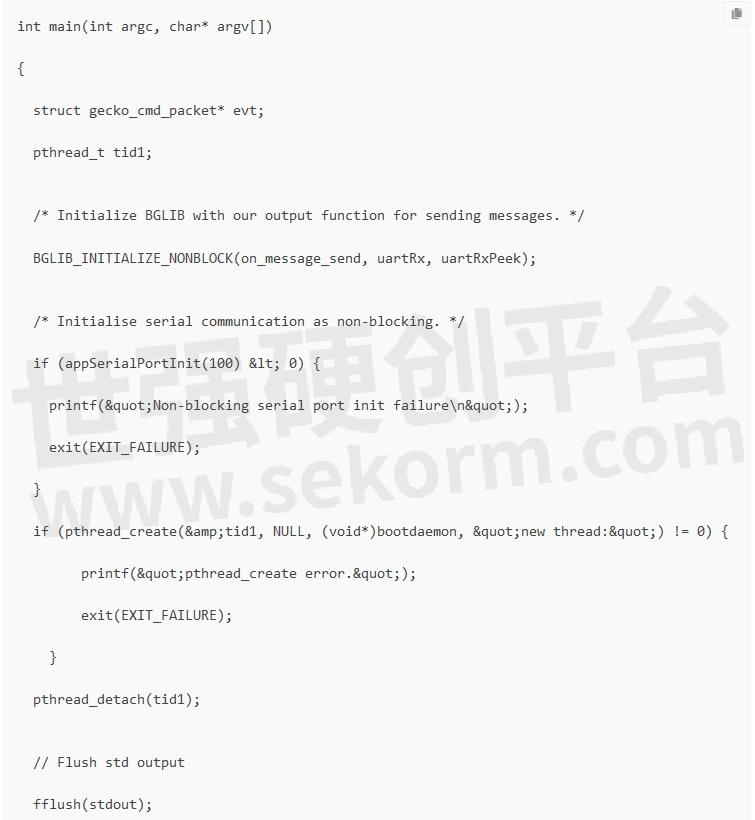
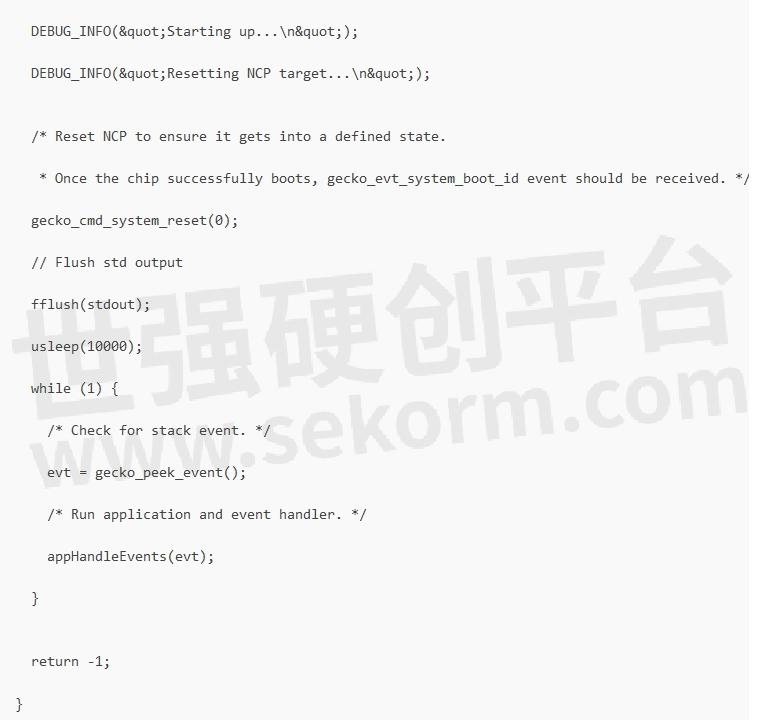
The current event is received by the variant evt, according to the different events the function appHandleEvents function would call the corresponding command. The function appHandleEvents is the main framework to schedule different functions, the main part of this function in file app. c is listed below,


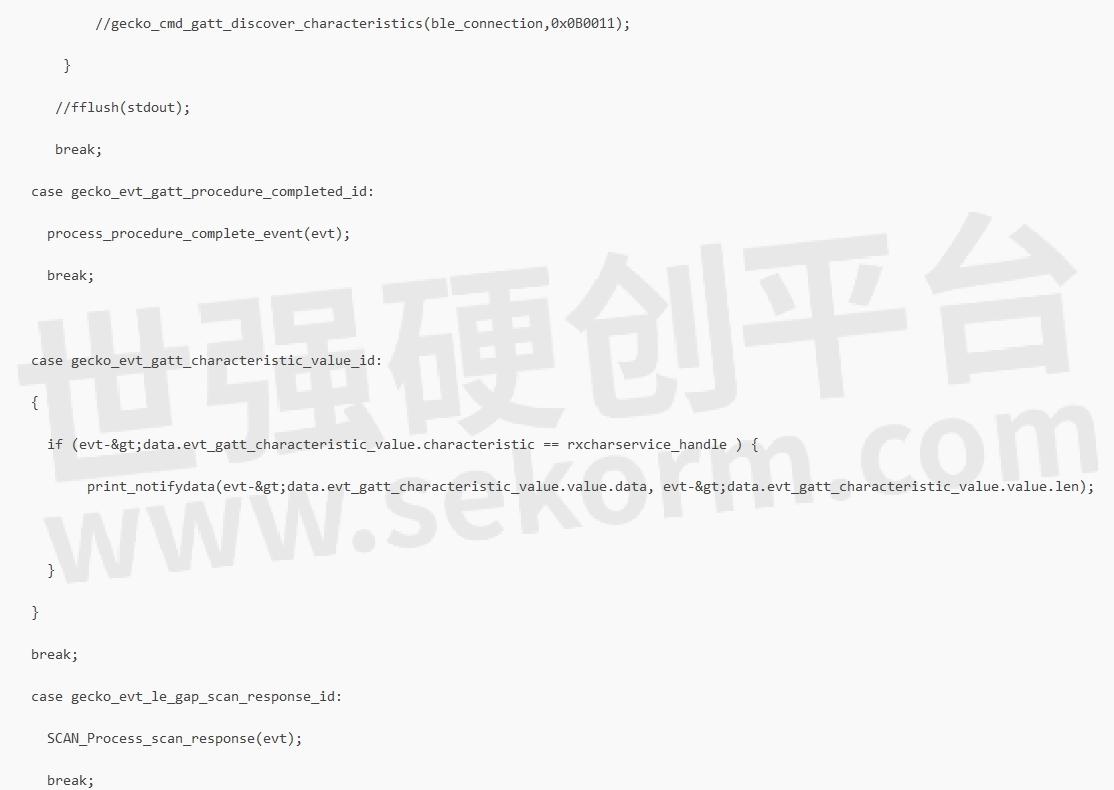

With different events reported to this function, it would invoke different functions. For example, if the program gets an event with event id gecko_evt_le_gap_scan_response_id, it would call the SCAN_Process_scan_response function and start the scanning process.
For the complete code, you can be in the attached file named BLE5_oximeter.
If you would prefer the code with uploading data to the mqtt broker function, you can view the code BLE5withpaho.
Run the oximeter sensor sample on the gateway
1) Get the Openwork toolchain and copy it to a Linux PC.
Get the cross-compile OpenWrt-Toolchain from Dusun, whose name is openwrt-sdk-ramips-mt7620_gcc-4.8-linaro_uClibc-0.9.33.2. Linux-x86_64.tar.bz2. Decompress the downloaded OpenWrt Toolchain to a local folder (E.g.: home/bc/ OpenWrt-SDKCHAOSCALMER).
2) Compiled the attached code files.
Copy the above code file to the Linux PC and decompress it to a folder (E.g.: home/bc/BLE5). Open the ./BLE5 folder, and edit the makefile file to revise the CROSSTOOLDIR to the OpenWrt toolchain directory you created above. This is depicted in Figure 3.

Figure 3 changes the CROSSTOODIR path
Then open a terminal on the Linux PC, and type the following commands:
cd BLE5_oximeter ;
make
Finally, the test bin file which can be run in the gateway has been compiled. (Figure 4).

Figure 4. The test application compilation
Copy the compiled test bin file into the gateway and run it.
There are several ways to do it, one of them is introduced below. Under Linux PC, you can use the SCP command (scp local_file remote_username @remote_ip:remote_folder) to do it. Make sure the gateway is connected to the same router as PC, then run the following commands:
scp test root@192.168.0.115:/root

Then remote login to the gateway using SSH commands or SSH client (windows: putty or SecureCrt) and run the copied bin file. The login password can be revised following the configuration steps in the above sections. Finally, we power up the oximeter device and run the test file, we can see the data the oximeter notified to the program as figure 5 shows. The data can be analyzed according to its manual. Figure 6/7 shows the sensor and gateway for testing respectively.
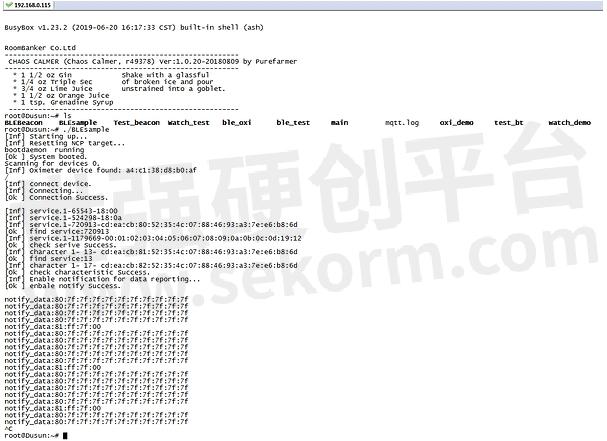
Figure 5

Figure 6 The oximeter device for testing
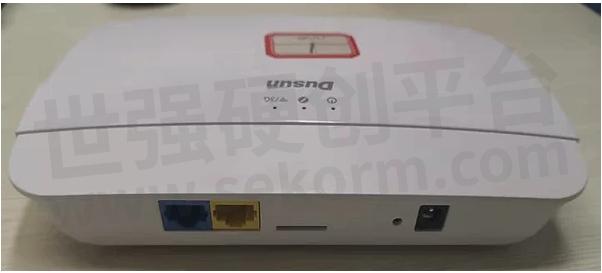
Figure 7 The Dusun Gateway for testing
- +1 Like
- Add to Favorites
Recommend
- Silicon Labs and Wirepas Enable IoT for Asset Tracking and Building Automation
- EFR32BG22 Wireless SoC Enables IoT Devices to Operate 10+ Years on 1 Conin Cell Battery | Silicon Labs
- BT677F Bluetooth Module Application in Charging station Provide a Maximum Power Output of 10dBm
- Silicon Labs’ Portfolio Includes SoCs Suited for Portable Medical Devices and Diabetes Management
- Introduction to Bluetooth Multi Connection
- Bluetooth Security® – How to Build Next-Generation Secure Key Management
- How to Build A Smart LED Bulb Design
- Differences Between IoT Gateway and Industrial Gateway
This document is provided by Sekorm Platform for VIP exclusive service. The copyright is owned by Sekorm. Without authorization, any medias, websites or individual are not allowed to reprint. When authorizing the reprint, the link of www.sekorm.com must be indicated.
Integrated Circuits


Discrete Components


Connectors & Structural Components


Assembly UnitModules & Accessories


Power Supplies & Power Modules


Electronic Materials


Instrumentation & Test Kit


Electrical Tools & Materials


Mechatronics


Processing & Customization


