How Is the Servo Controlled Through PWM?

DSPOWER servo motor is commonly controlled through Pulse Width Modulation (PWM). This control method allows you to precisely position the servo’s output shaft by varying the width of electrical pulses sent to the servo. In this article DSpower will show how it works.
Pulse Width Modulation (PWM): PWM is a technique that involves sending a series of electrical pulses at a specific frequency. The key parameter is the width or duration of each pulse, which is typically measured in microseconds (µs).
Center Position: In a typical servo, a pulse of around 1.5 milliseconds (ms) indicates the center position. This means the servo’s output shaft will be at its midpoint.
Direction Control: To control the direction in which the servo turns, you can adjust the pulse width. For instance:
A pulse less than 1.5 ms (e.g., 1.0 ms) would cause the servo to turn in one direction.
A pulse greater than 1.5 ms (e.g., 2.0 ms) would cause the servo to turn in the opposite direction.
Position Control: The specific pulse width directly correlates with the position of the servo. For example:
A 1.0 ms pulse might correspond to -90 degrees (or another specific angle, depending on the servo’s specifications).
A 2.0 ms pulse might correspond to +90 degrees.
Continuous Control: By continuously sending PWM signals at varying pulse widths, you can make the servo rotate to any desired angle within its specified range.
DSpower Servo Update Rate: The speed at which you send these PWM signals can affect how fast the servo responds and how smoothly it moves. Servos typically respond well to PWM signals with frequencies in the range of 50 to 60 Hertz (Hz).
Microcontroller or Servo Driver: To generate and send PWM signals to the servo, you can use a microcontroller (like an Arduino) or a dedicated servo driver module. These devices generate the necessary PWM signals based on the input you provide (e.g., the desired angle) and the servo’s specifications.
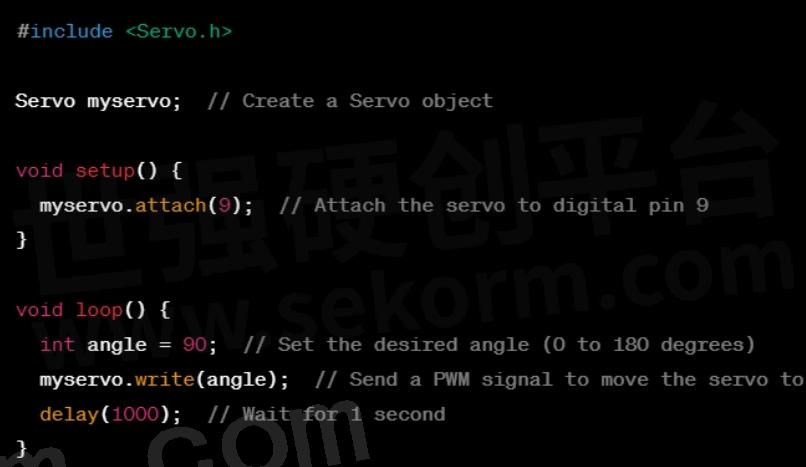
Here’s an example in Arduino code to illustrate how you might control a servo using PWM:

In this example, a servo object is created, attached to a specific pin, and then the write function is used to set the servo’s angle. The servo moves to that angle in response to the PWM signal generated by the Arduino.
- +1 Like
- Add to Favorites
Recommend
- Nidec Launches New Models of FLEXWAVE Precision Control Reducers,Facilitating Servo Motor Installation
- What Is Servo? How Does the Servo Work?
- Nidec Develops AC Servo Motor Equipped with Zignear® , the Location Detection Technology that Accommodates 17-bit Resolution, for the Industrial Robot Market
- Choose Servo without Getting Lost: How to Choose the Right Servo According to the Specifications!
- Why Can the Servo Motors Accurately Control the Rotation of the Model Aircraft?
- DSpower Sweeping Robot Servo with High Torque Enables Precise Movement Control and Efficient Cleaning Operations in Sweeping Robots
- Nidec Launches a Lineup of VR Series Servo Motor Reducers for Food Machinery, Achieving a Torque of up to 80% of Standard Models
- Robot Servo: Key Elements Analysis and Selection Guide
This document is provided by Sekorm Platform for VIP exclusive service. The copyright is owned by Sekorm. Without authorization, any medias, websites or individual are not allowed to reprint. When authorizing the reprint, the link of www.sekorm.com must be indicated.


