Developing GUI for The Embedded with PPT? Installing A Color LCD without Programming
Nowadays, smart phones play an indispensable role in our lives. Thus, the graphical UI is becoming increasingly significant amongst smart phone users.
Besides, more and more embedded device manufacturers are providing a variety of lineups from a hard key and a segment LCD to a color LCD. Many customers who try a color LCD for the first time find it difficult to develop a GUI for the color LCD I had not realized this problem before, but can you imagine how you can develop and display a GUI with the C Programming Language? You can rest assured because a super-easy-to-use tool is available for Renesas RX Family 32-bit MCUs. It enables you to easily develop a GUI, even if you cannot write the C programming language you can still use Microsoft® Power Point® (hereafter called “PPT”). There is the Aeropoint® GUI for RX, a tool provided by CRI Middleware Co., Ltd. (hereafter called “CRI”).
I have prepared a kit for this demonstration for your viewing.
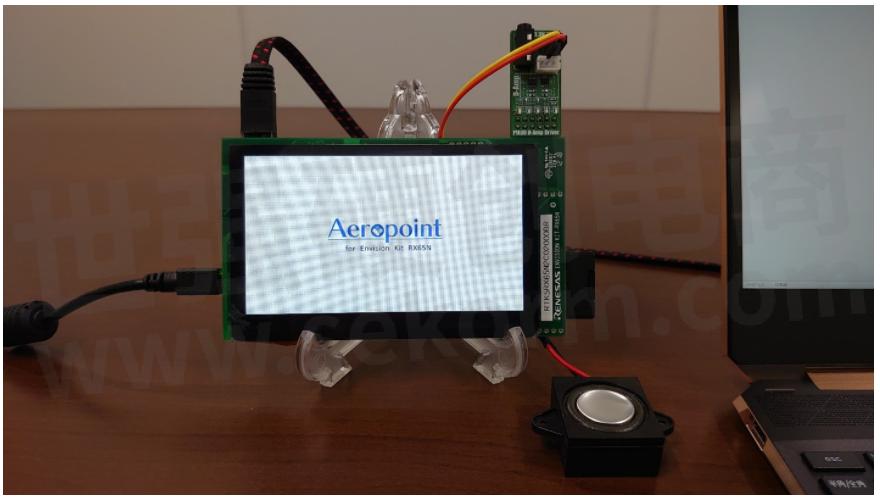
The kit is based on the Envision kit with 32-bit MCU, RX65N and includes Ethernet and an extended board for audio.
Now, let’s start PPT by connecting it to PC.
I will create a simple picture as a test.

I have made an example of an air conditioning controller.
Add a button with arrow for UP/DOWN to change the temperature settings, an operation/stop button and a menu button.Then, click the Run button in Add-on in PPT…
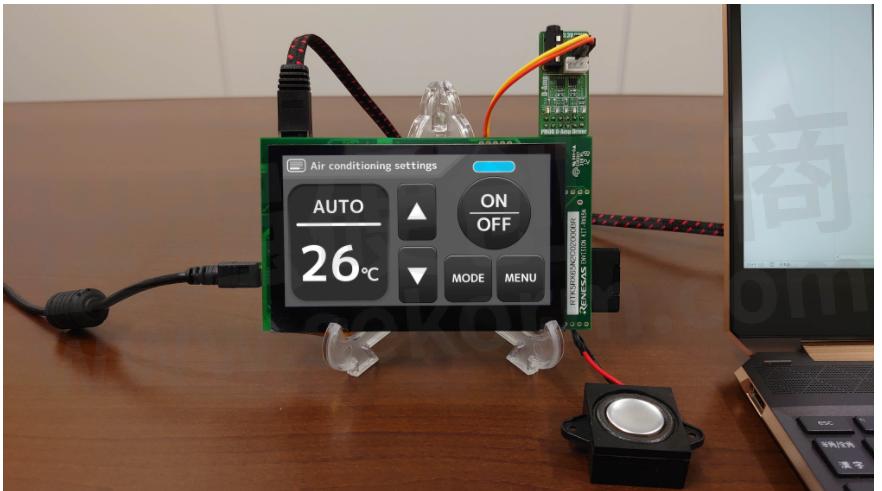
…..complete!!
Since a GUI which was once displayed is written into a storage on the board, when separating the PC from the kit, it operates on its own This display was created so smoothly and quickly, don’t you feel developing a GUI is so simple now?
To complete the GUI development, now you just have to set up screen transitions when a button on the touch panel is tapped and a command is sent from an external interface.
For example, when you touch the button for turning up temperature settings on the touch panel, a command for changing the temperature is sent to a control module (PC in this case) and the module will send the changed temperature setting to the board, and then it is reflected on the numerical value on the screen in real time.
These operations can be built in by specifying objects in PPT.
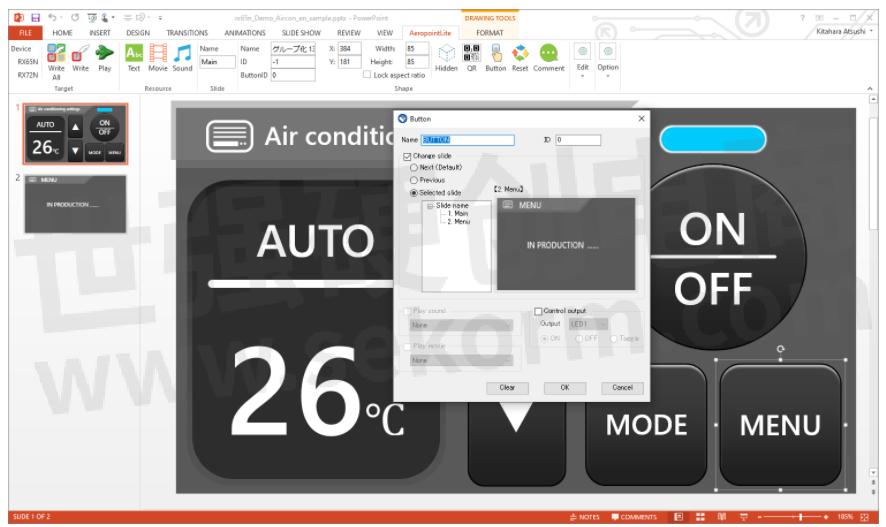
By clicking the Run button again, the kit is updated, so debugging is easy, too.
Furthermore, this tool has another highly recommended function. Believe it or not, this tool can produce both video and sound. Since you go out of your way to install an LCD, you probably want to utilize both of them to display advertisements.
When you import a sound you want to produce on PPT, the sound can be outputted with the D-Amp Driver by CRI. An appealing point is to be able to produce a sound just by connecting a simple speaker of just a few dollars without mounting an expensive audio producing circuit.

Audio data is imported in a compressed form for embedded devices, which is also an advantage.
Likewise, by registering a video on PPT and transferring it to a linked page, it is replayed in full screen. Of course, with sound.
Even though the number of colors is apparently reduced to 256 colors by MCUs for embedded devices at that, the kit can re-play such a beautiful video. I have never seen a tool like this. What makes this possible is, a wide variety of techniques which CRI have cultivated in the field of entertainment incorporated into the kit.
- +1 Like
- Add to Favorites
Recommend
- Simplify connection and deployment, Renesas released CK-RA6M5 and CK-RX65N IoT development kits
- Renesas Launches Cellular-to-Cloud IoT Development Platforms Powered by RA and RX MCU Families
- Renesas Cellular-to-Cloud Development Kits Now Connect Seamlessly to Microsoft Azure Cloud Services
- Renesas RX Becomes World‘s First General-Purpose MCU to Obtain CMVP Level 3 Certification Under NIST FIPS 140-2
- Renesas DSP Solution on Renesas Lab on the Cloud, Input Analog Signals Directly From A Signal Generator To The Rx231 Microcontroller Evaluation Board
- The Past and the Future of Renesas RX Family Software
- Renesas‘ Semiconductor Manufacturing Factory (Naka Factory) Fire: Production Capacity Has Recovered to 88%
- Renesas Announces 10 New Winning Combinations Integrating Celeno and Renesas Products
This document is provided by Sekorm Platform for VIP exclusive service. The copyright is owned by Sekorm. Without authorization, any medias, websites or individual are not allowed to reprint. When authorizing the reprint, the link of www.sekorm.com must be indicated.
Integrated Circuits


Discrete Components


Connectors & Structural Components


Assembly UnitModules & Accessories


Power Supplies & Power Modules


Electronic Materials


Instrumentation & Test Kit


Electrical Tools & Materials


Mechatronics


Processing & Customization


